If you want to accept donations on your WordPress website, you might think you need a heavy eCommerce plugin like WooCommerce.
The truth is—you don’t.
In this guide, you’ll learn how to accept donations in WordPress without WooCommerce, using a simple, fast, and beginner-friendly method.
🎁 Want the easiest way? (Quick Solution)
If you want to skip the complex setup, you can use a lightweight plugin:
👉 Download WP Stripe Donation Plugin
https://wordpress.org/plugins/wp-stripe-donation/
With this plugin, you can:
- Accept donations in minutes
- Avoid WooCommerce completely
Why Avoid WooCommerce for Donations?
WooCommerce is powerful—but it’s overkill for donations.
Here’s why many users avoid it:
- ❌ Too heavy for simple donation forms
- ❌ Requires multiple add-ons for recurring payments
- ❌ Slows down your website
- ❌ Complicated setup for beginners
👉 If your goal is just collecting donations, there’s a better way.
✅ Better Solution: Use a Simple Stripe Donation Plugin
Instead of WooCommerce, you can use a dedicated donation plugin built for simplicity.
Why WP Stripe Donation Plugin?
- ⚡ No WooCommerce required
- 💳 Secure Stripe payments
- 🧩 Easy shortcode integration
- 🚀 Lightweight and fast
👉 Get started here:
https://wordpress.org/plugins/wp-stripe-donation/
Step-by-Step: Accept Donations Without WooCommerce
Step 1: Install the Plugin
- Go to your WordPress dashboard
- Navigate to Plugins → Add New
- Search for AidWP
- Click Install and then Activate
👉 Or install directly:
https://wordpress.org/plugins/wp-stripe-donation/
Step 2: Connect Your Stripe Account
- Go to plugin settings
- Add your Stripe API keys
- Enable Test Mode (for testing)
You can create a Stripe account in minutes if you don’t have one.
👉 Check this tutorial for Stripe Connection
Step 3: Create Your Donation Form
You can easily configure:
- Fixed donation amounts (e.g., $10, $25, $50)
- Custom donation amount
👉 This helps increase average donation value.
Step 4: Add the Form to Your Website
Use a simple shortcode:
[wp_stripe_donation]Add it to:
- Pages
- Posts
- Sidebar
Step 5: Test Before Going Live
- Enable Stripe Test Mode
- Make a test donation
- Confirm everything works
Then switch to Live Mode.
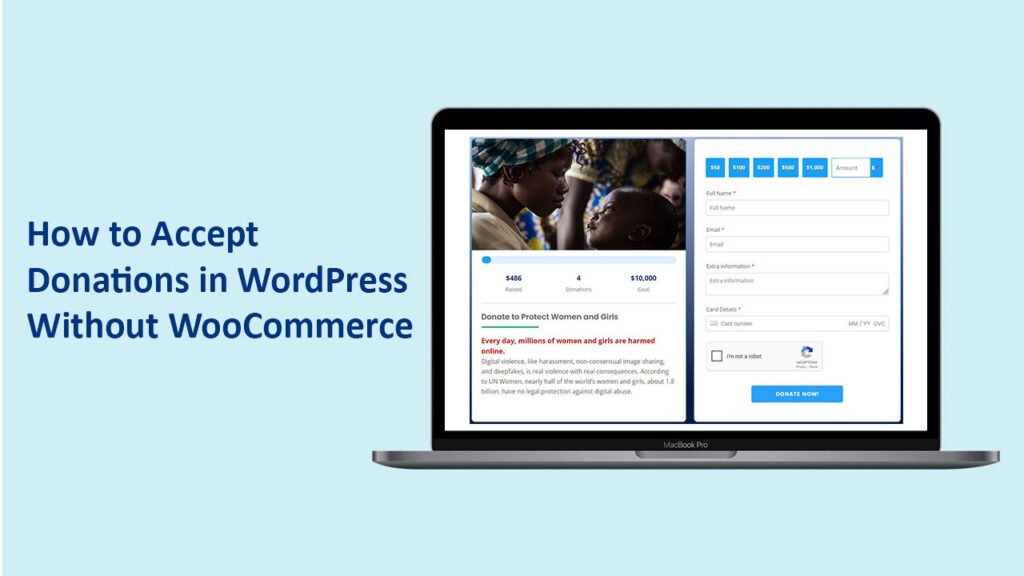
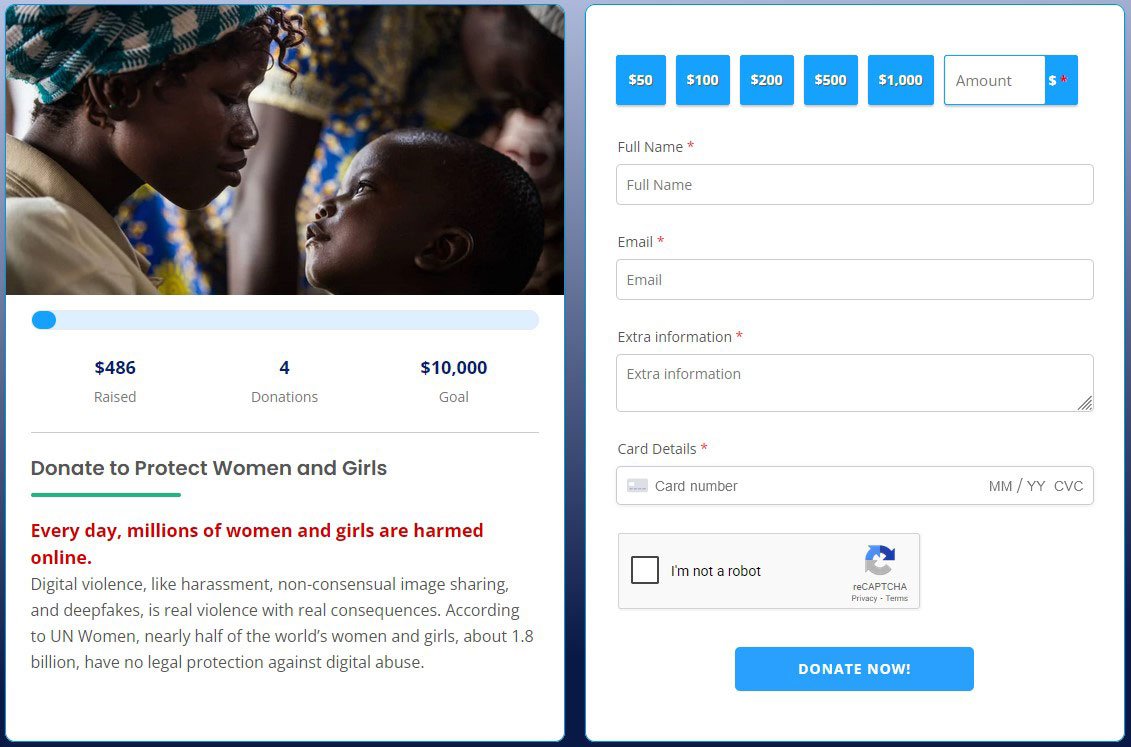
🖥️ What Your Donation Form Looks Like
A clean, simple donation form should include:
- Donation amount options
- Card
- Minimal fields
- Fast checkout
👉 This simplicity is what increases conversions.
💡 Tips to Increase Donations
✅ Use Suggested Amounts
Guide users with options like:
- $10
- $25
- $50
✅ Add a Strong Call-to-Action
Example:
“Support our mission—donate today”
✅ Keep It Simple
Fewer fields = higher conversions
WooCommerce vs Simple Donation Plugin
| Feature | WooCommerce | WP Stripe Donation |
|---|---|---|
| Setup | Complex | Simple |
| Speed | Heavy | Fast |
| Recurring Donations | Requires addons | No |
| Ease of Use | Moderate | Beginner-friendly |
👉 For donations, simpler wins.
🚀 Start Accepting Donations Today
You don’t need WooCommerce to accept donations.
With a simple plugin, you can:
- Launch in minutes
- Keep your site fast
- Provide a better donor experience
👉 Download WP Stripe Donation Plugin now:
https://wordpress.org/plugins/wp-stripe-donation/
Frequently Asked Questions
Is Stripe safe for donations?
Yes. Stripe is one of the most secure and trusted payment processors worldwide.
Do I need coding skills?
No. Everything works with simple settings and a shortcode.
🎯 Final Tip
If you’re serious about collecting donations:
👉 Don’t overcomplicate it.
👉 Use a lightweight solution.
👉 Focus on simplicity and speed.
Start today and make it easy for people to support your cause.
👉 Get the plugin here:
https://wordpress.org/plugins/wp-stripe-donation/